Installing Paramettrik Library takes about a minute, and you don't need to be an IT person to do it. This page walks you through every screen, so you always know exactly what's happening — and what comes next.
Before you start
A quick checklist — you probably already tick every box:
Windows 10 or 11. Either one works just fine.
Autodesk Revit, any version from 2022 to 2027. One is enough, several is fine too — the installer finds them for you.
No administrator rights needed. Everything installs into your own user profile, so you won't have to call IT or type an admin password.
Close Revit first. Revit holds on to plugin files while it's running, so the installer will politely ask you to close it before going further.
Everything comes in one single file — just double-click it and you're on your way:
ParamettrikLibrary-Setup-v1.0.0.exeDon't have the file yet? Get it from the download page.
A note about Windows SmartScreen
Windows may show "Windows protected your PC — unknown publisher". Don't worry — this simply means the installer isn't code-signed yet, not that anything is wrong with the file. Click More info, then Run anyway, and continue.
Installation
1. Welcome
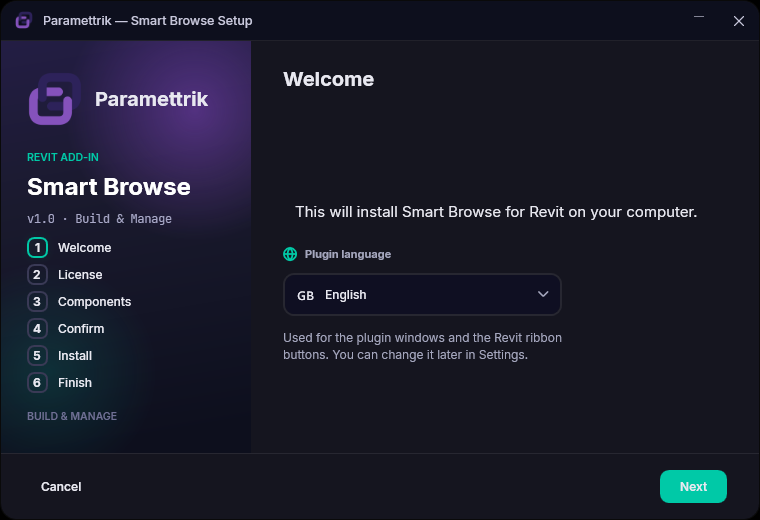
First things first: pick the language you'd like the plugin to speak. This one choice covers both the plugin's buttons in the Revit ribbon and the plugin's windows. Not sure yet? Pick anything — you can change it anytime later in the plugin's Settings. Click Next.
2. License Agreement
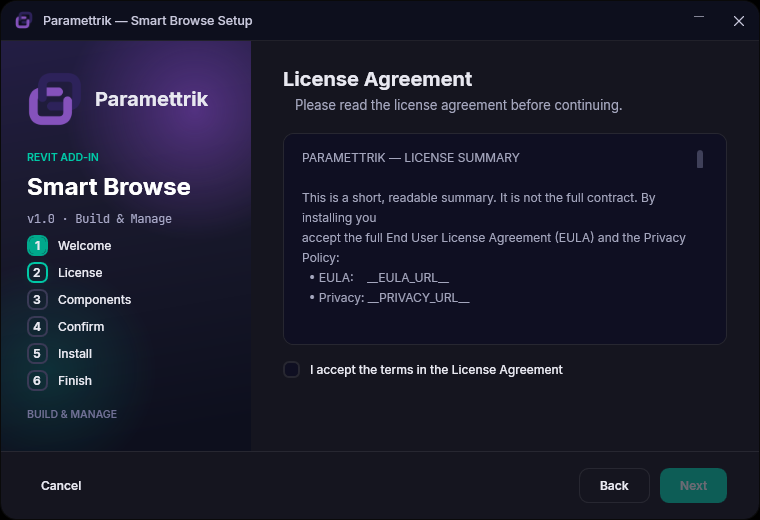
Take a moment to read the license summary — we've kept it short on purpose, and the full EULA and Privacy Policy are one click away if you want the details. Tick "I accept the terms in the License Agreement", and the Next button lights up. Click it.
3. Select Components
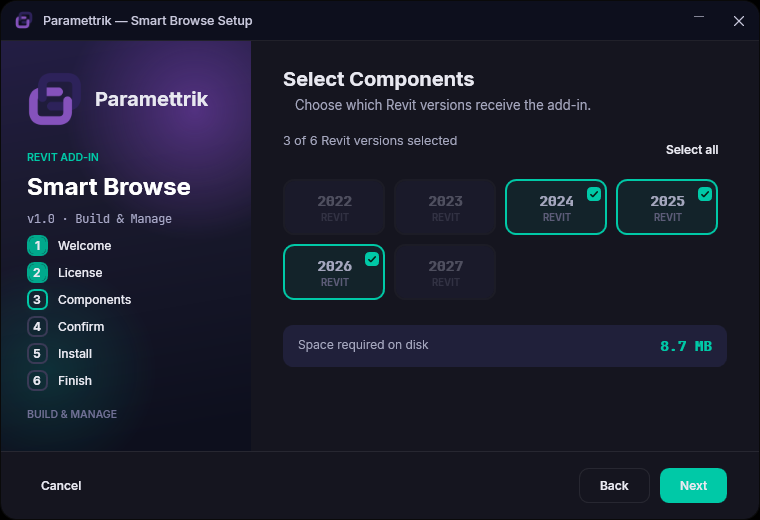
Here's where the installer shows what it found. It lists Revit 2022 to 2027, with the versions installed on your computer already pre-selected — versions you don't have are simply dimmed. Keep the selection as it is, or tick and untick to install exactly where you want (there's a Select all if you want everything). The disk space figure updates as you go — spoiler: it's tiny. Click Next.
4. Ready to Install
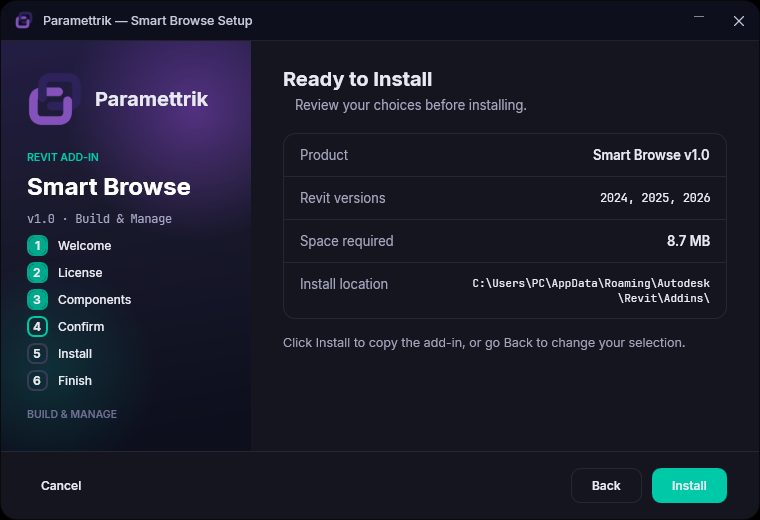
One last look before anything happens: the product, the Revit versions you picked, the disk space, and where it's all going. Spotted something you'd like to change? Back takes you there. All good? Click Install.
5. Installing
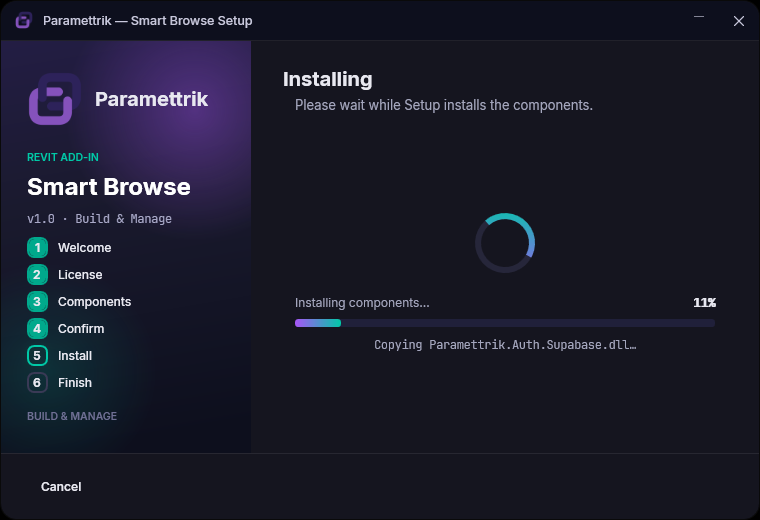
Sit back — the installer is copying the add-in into each Revit version you selected. It's usually done in a few seconds, barely enough time for a sip of coffee.
6. Installation Complete
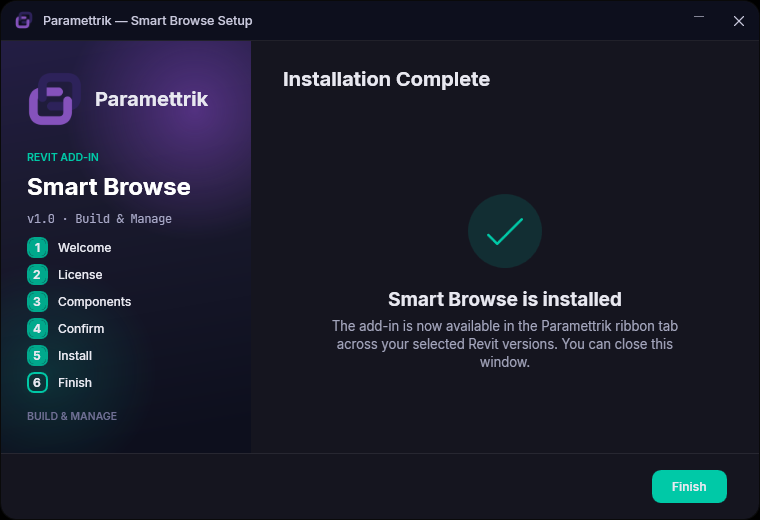
That's it — you're done! Click Finish, open Revit, and say hello to the new Paramettrik tab in your ribbon. It's there in every Revit version you selected. Enjoy!
Where it lives on your computer
For each Revit version you selected, the add-in sits quietly in your user profile:
%APPDATA%\Autodesk\Revit\Addins\{year}\Nothing touches Program Files or your system folders — which is exactly why no administrator rights are needed.
Updating or reinstalling
New version out? Just run the new installer — no need to uninstall anything first. It performs a clean replace: the old version is removed, the new one takes its place, done. It's also a handy way to change which Revit versions are covered — anything you deselect gets cleaned up. And your Add or remove programs list stays tidy: one single entry, never duplicates.
Uninstalling
Sad to see you go — but if you need to, it's just as painless. Open Windows Settings → Apps → Installed apps (or Control Panel → Programs → Uninstall a program), find "Paramettrik Library (Revit add-in)" — publisher Paramettrik — and choose Uninstall.
Confirm
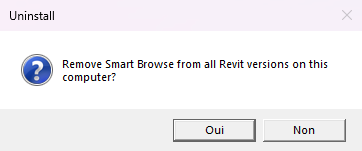
The installer double-checks that you really want to remove the add-in from all Revit versions on this computer. Click Yes.
Done
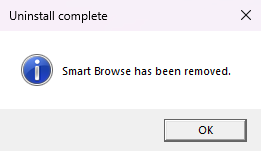
The add-in is gone from every Revit version, and its entry disappears from Add or remove programs.
Good to know: your license and preferences stay put
Uninstalling only removes the plugin files — your activation (tied to this computer) and your settings are kept safe. If you come back later, a simple reinstall picks up right where you left off, no license key to re-enter. We like to think of it as leaving the door open. 🙂